This guide will help set up a Mac OS computer to program an ATtiny 85 using the USB Tiny AVR Programmer from Sparkfun and the Arduino IDE.
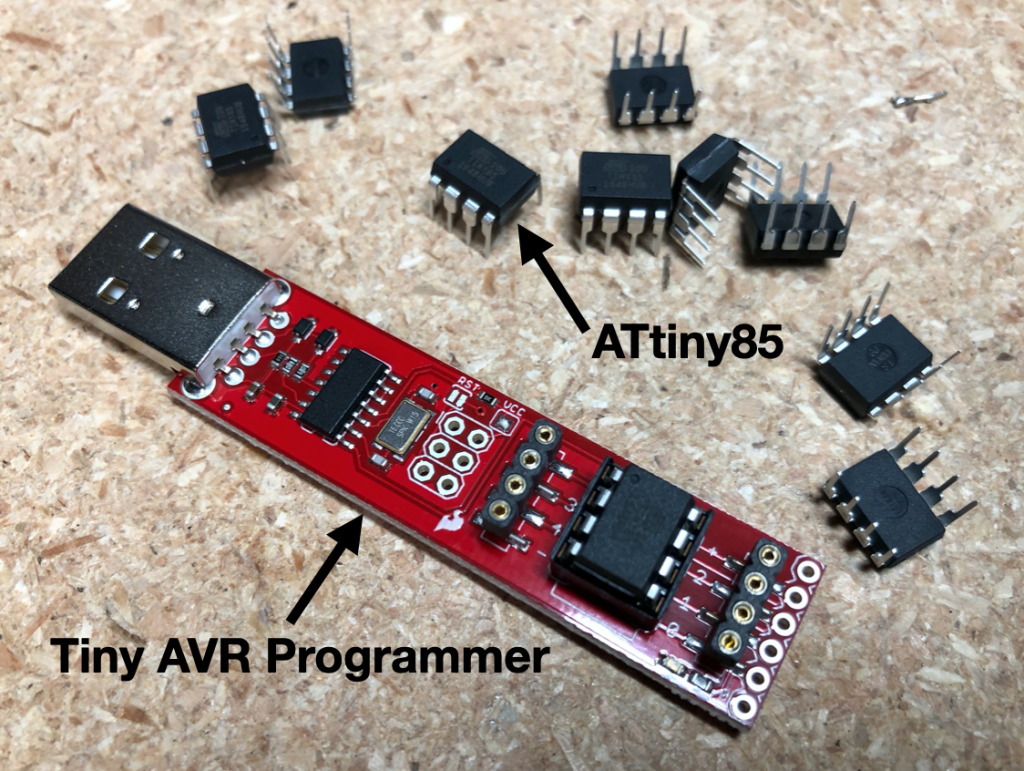
Required Items:
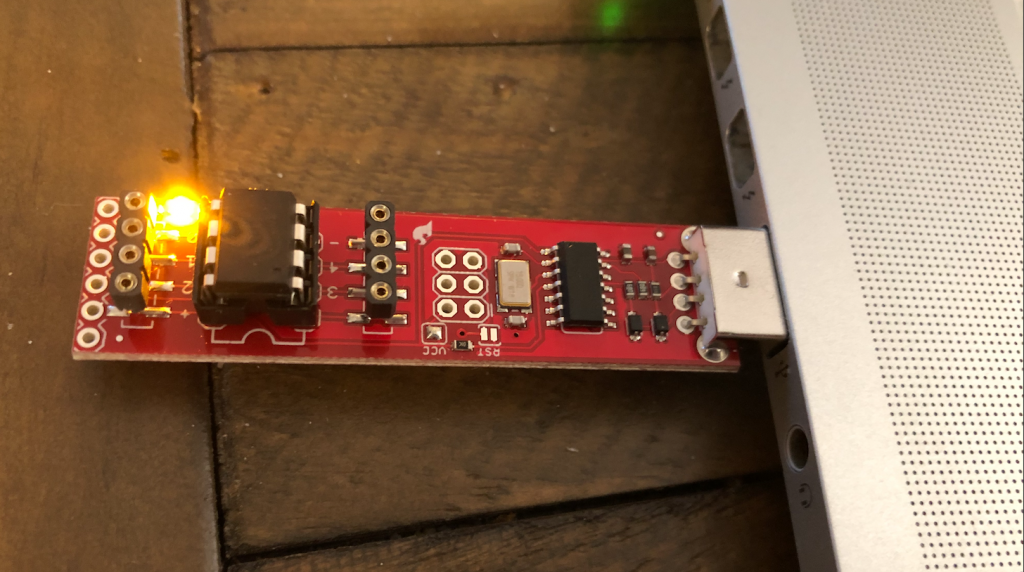
- Sparkfun Tiny AVR Programmer (Sparkfun) – This is a handy USB based programmer for ATtiny microcontrollers. It is powered by an ATtiny84 that is set up as a USBtinyISP programmer. The board has an 8 pin socket to hold a ATtiny45/85 microcontroller that you want to program.
- ATtiny 85 Microcontroller (Digikey) – The ATtiny85 is a low-power 8-bit microcontroller based on the AVR enhanced RISC architecture.
- Arduino IDE (Download)
- Mac computer (e.g. MacBook Pro) with OS 10.14 or later
I used the following steps to get the Sparkfun Tiny AVR Programmer working on my Mac. Hopefully this will be helpful for you as well. Your experience may vary.
Step 1: Install ATtiny85
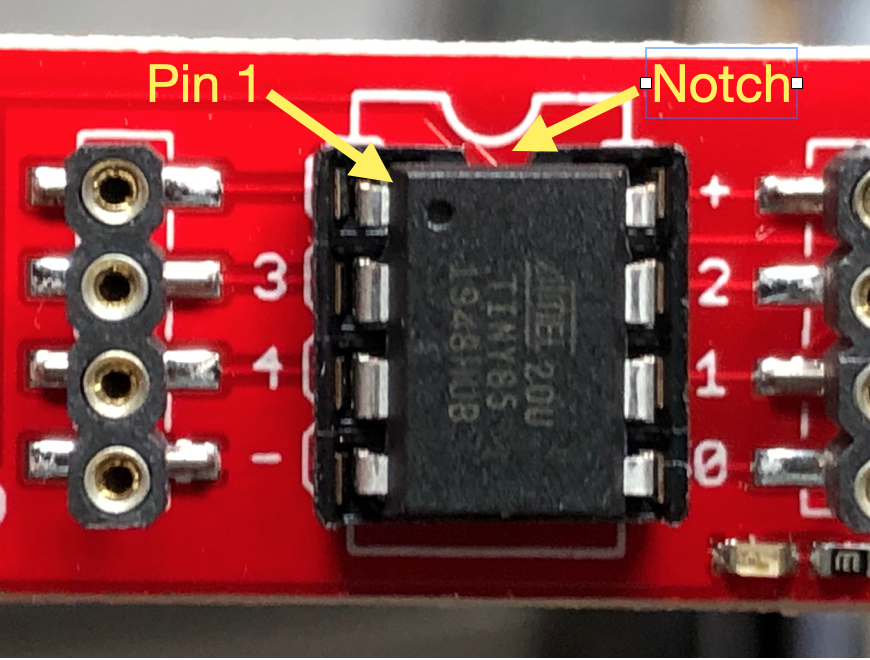
Install the ATtiny 85 into the programmer. Make sure you orient the chip so that pin 1 (usually identified by a dot) is by the notch. Once this is installed, plug the USB into your computer. You will not see a light and Mac OS will not recognize it as a serial port (don’t worry).
Step 2: Set up Arduino IDE

Install the Arduino IDE software (Download) and navigate the menu Arduino -> Preferences and in the field for “Additional Board Manager URL” paste this link:
https://raw.githubusercontent.com/damellis/attiny/ide-1.6.x-boards-manager/package_damellis_attiny_index.json
Click “OK” to save and restart the Arduino IDE. Navigate the menu Tools -> Board -> Boards Manger and type “attiny” into the top search board and there will click on the “Install” button on the attiny board package.

You should now see an entry for ATtiny in the Tools > Board menu. Select “ATtiny25/45/85”.
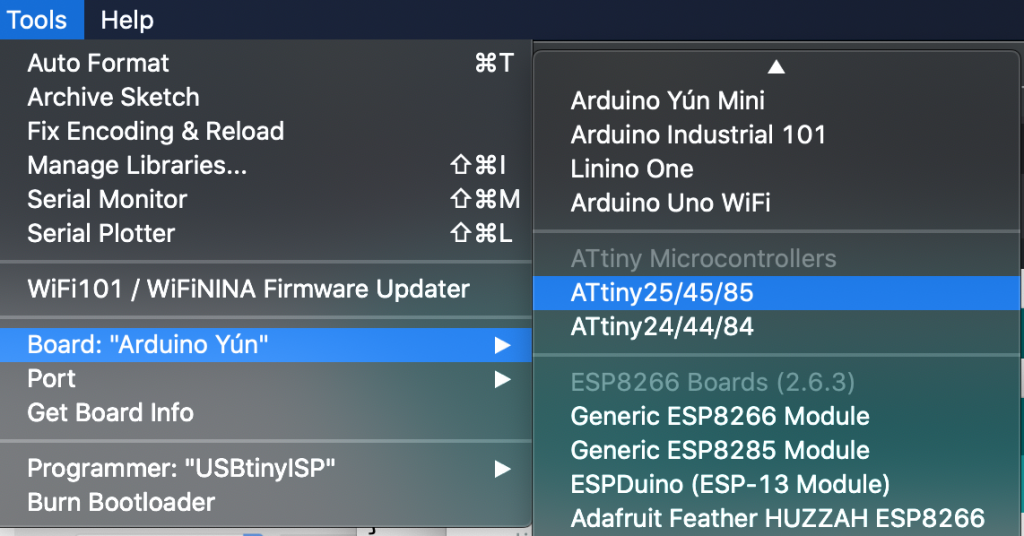
For “Processor” select the chip you are using, e.g. ATiny85.
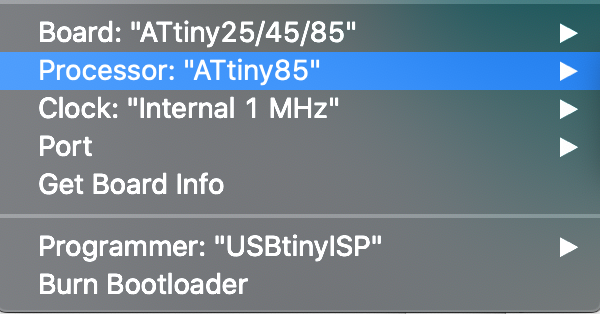
For “Programmer” select “USBtinyISP“
For “Clock” unless you have an external crystal in your circuit, you should select “Internal” and 1 MHz seems to be fine for most projects.
Finish by clicking “Burn Bootloader“. You should see the LED on the programmer flash. If it doesn’t work, you may need to Quit the Arduino IDE and restart to try again.
Please note: On the Mac, you do NOT select a serial “Port”. The IDE will program the ATtiny through the USBtinyISP that is loaded on the Tiny AVR Programmer board.
Step 3: Program your ATtiny85
You can use the example blink test to make sure you can program your ATtiny85. You can use the built in blink test but you will need to change the LED_BUILTIN to be 0 (zero). You can also copy and past the following code:
void setup() {
  pinMode(0, OUTPUT);
}
void loop() {
  digitalWrite(0, HIGH);
  delay(1000);
  digitalWrite(0, LOW);
  delay(1000);
}
Arduino 1.x IDE: Click the upload button (right arrow) or press Command-U.
Arduino 2.x IDE: Select Sketch > Upload Using Programmer or Shift-Command-U

Once uploaded, the built-in LED should start to flash.
The ATtiny85 has PWM (Pulse Width Modulation) outputs so you can use the analogWrite() function to adjust the brightness of the LED from 0 to 255. Here is an example that fades the LED.
/*
  Fade
  This example shows how to fade an LED on using the analogWrite()
  function.
  The analogWrite() function uses PWM, so if you want to change the pin you're
  using, be sure to use another PWM capable pin. On most Arduino, the PWM pins
  are identified with a "~" sign, like ~3, ~5, ~6, ~9, ~10 and ~11.
*/
int led = 0;           // the PWM pin the LED is attached to
int brightness = 0;    // how bright the LED is
int fadeAmount = 1;    // how many points to fade the LED by
void setup() {
  pinMode(led, OUTPUT);
}
void loop() {
  analogWrite(led, brightness);
  brightness = brightness + fadeAmount;
  // reverse the direction of the fading at the ends of the fade:
  if (brightness <= 0) {
     analogWrite(led, 0);
     delay(1500);
     fadeAmount = -fadeAmount;
  }
  if(brightness >= 255) {
    fadeAmount = -fadeAmount;
  }
  delay(10);
}
References
This was tested on Arduino 1.x and 2.x IDEs, on an Intel i7 based Apple MacBook Pro and on an M2 based MacBook Air using an USB-C to A adapter.
- High-low tech: Programming an ATtiny w/ Arduino 1.6 (or 1.0) – http://highlowtech.org/?p=1695
- Instructables: Program an ATtiny With Arduino – https://www.instructables.com/id/Program-an-ATtiny-with-Arduino/
- Getting started with Atmel ATtiny85 (AVR Programming) – https://electronut.in/getting-started-with-attiny85-avr-programming/
- Programming with AVRdude – https://learn.adafruit.com/introducing-trinket/programming-with-avrdude
- Crosspack for AVR Development – https://www.obdev.at/products/crosspack/index.html
- How to Program an Attiny85 From an Arduino Uno – https://www.instructables.com/id/How-to-Program-an-Attiny85-From-an-Arduino-Uno/
- Programming the ‘AtTiny85’ With the ‘Tiny AVR Programmer’ and Supplemented ‘Arduino IDE’ – https://www.instructables.com/id/Programming-an-Atmel-AtTiny85-using-Arduino-IDE-an/
